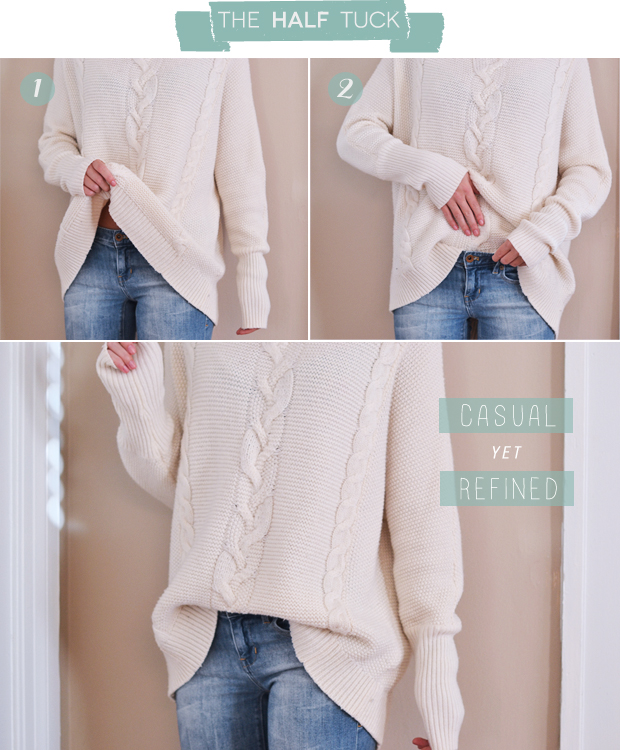
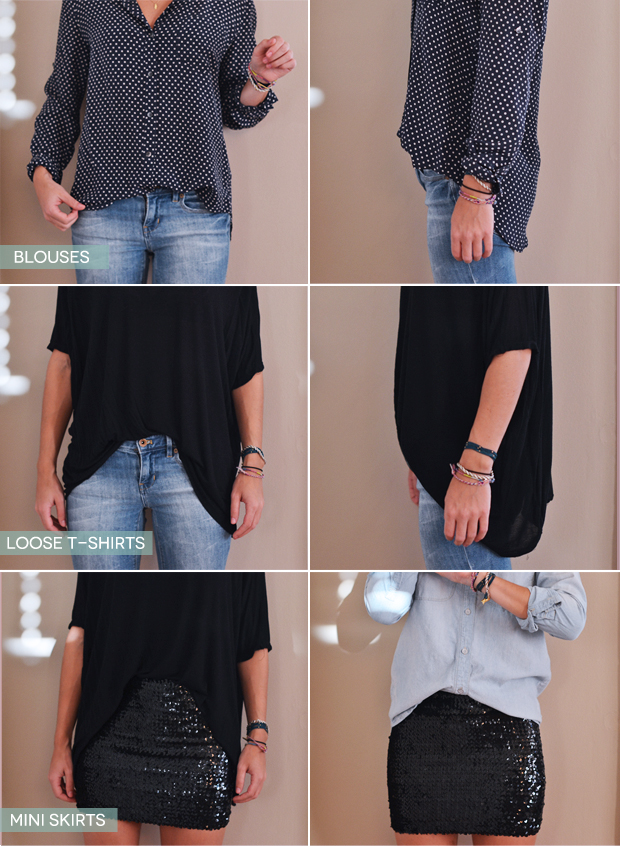
The ‘tuck’ (also known as the half-tuck, or the tuck-in) is a little trick that while it may seem insignificant, actually has a visual impact to your outfit and gives your style a little update. We’re not talking about the full tuck-in, but rather the “too cool for school” tuck.
It seems a little rebellious like, “oh I couldn’t care to do a full-tuck”, but also with an air of, “I did that on purpose and I like it, so what?”. But there’s an art to this, you don’t want this to look like a sloppy, disorganised mess. You want it to look intentional but effortless at the same time. Isn’t that a paradox?
Just HOW do we achieve the ‘tuck’? Here’s how.

1. Grab the middle bottom section of your top.
2. Keep it as taught as possible and tuck it 2 inches into the front of your bottom (pants or skirt
3. Smooth the front of your shirt and voila

This works best with tops that are a little flow, slim fit and soft enough to drape around the waist line of your bottom. Those that are overly stiff and structured won’t give the same effect and in fact, probably work better as full tuck-in.
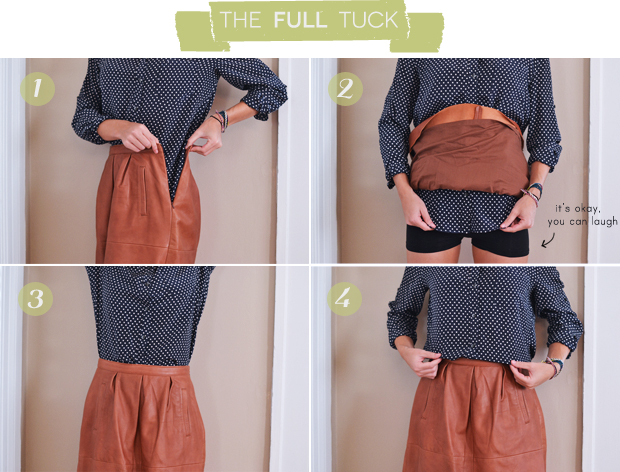
Now if the ‘tuck’ isn’t for you, then stick to the full tuck-in and there are easy ways to achieve this.

- Always put your shirt on first, button it up and smooth it down the front
- If you’re pairing it with a skirt, pull your shirt down once the skirt is on from beneath as far as you can. If you’re pairing it with pants, pull the shirt down as much as you can before you button it up.
- Lift up your hands so you’ll be able to have natural movement and won’t be overly constricted. A little bit of the shirt popping out is fine.
Say goodbye to the sloppy mess and awkward flaps, if you follow this very simple 3-step process for the ‘tuck’ or the full tuck-in.
How do you usually make sure you don’t look sloppy and disheveled? Share a few of your suggestions with us!
– Cover Image: babber.com
Related:


